Archive for the ‘Recipes’ Category
Tender Grassfed Barbecue
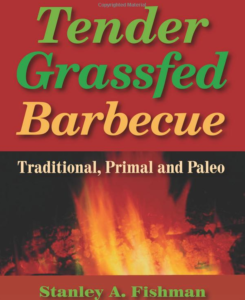
Fantastic Grassfed Barbecue
It’s been just over two years since I first started using Mr. Fishman’s previous book, Tender Grassfed Meat. I still use it all the time and every recipe I have tried has been wonderful. To me this shows an author who truly tests their recipes and takes the best ones for their book.
I was so excited to get this new book and see what new recipes there were to try. Cooking grassfed meat is very different then cooking corn fed meat. It’s much better for us and for the animals and the taste is truly wonderful, but learning to cook it can be challenging at first. Once you learn the methods it’s easy but you do need to learn the differences.
This book is broken into three sections. The first section is an overview of the benefits of traditional foods and traditional barbecue methods. There have been article about how it’s unhealthy to barbecue meat, and this book gives you how to barbecue healthfully, using real food ingredients.
In the second section there’s a great section on barbecue cookers, equipment and fuel – I learned a lot from this one. How to use indirecting cooking and traditional barbecue flavors and ingredients. There’s also a section on types of grassfed and pastured meat, how to prepare and finding and using grassfed and healthy fats.
The third and largest section is the recipes and there are a lot. Recipes for broth, Beef, Bison, Lamb and Pork. Also a section on Baste, Raw Vegetable Condiments and two sections on side dishes, one of them specifically for low carb side dishes. I’ve made a few recipes so far, the Shashlik Shoulder Roast, Basil Lamb burgers and the Chimichurri Sauce. They were all delicious and there are many more recipes I plan to try.
This book is great for everyone who wants to barbecue healthfully. If you are eating Low carb, Paleo, Primal/ Real Food it’ll give you many, new healthful recipes for you and your family. Highly recommended!
Click the image below to take you to the Amazon page:

Read more, great Monday Mania posts here: http://www.thehealthyhomeeconomist.com/2011/10/monday-mania-10242011/
Read more, great Fat Tuesday posts here: http://realfoodforager.com/2011/10/fat-tuesday-october-25-2011/
Read more, great Real Food Wednesday posts here: http://kellythekitchenkop.com/2011/10/real-food-wednesday-10262011.html
Read more, great Simple Lives Thursday posts here: http://gnowfglins.com/2011/10/26/simple-lives-thursday-67/
Read more, great Pennywise Platter Thursday posts here: http://www.thenourishinggourmet.com/2011/10/pennywise-platter-thursday-1027.html
Easy Thai Curry Recipe

Easy Thai Curry Recipe
We love Thai food and I can make a pretty good Indian Curry but wasn’t having much luck with Thai curry until I found Mae Ploy brand curry pastes in our local Asian Market. They are inexpensive, $2.50 or so each and each container will make many curries as you only need a tablespoon or two if you like it really spicy.
They come in many varieties, Yellow, Panang, Green, Red and Massaman and are all natural. The ingredients in the Panang – one of our favorites – is: Dried red chillie, Lemongrass, Shallot, Salt, Garlic, Galangal, Mung beans, Shrimp paste, Kaffir lime peel, Coriander seeds, Cumin, Pepper

All the other varieties have similar ingredients.
You can make a super easy curry dinner. I just pour one can of Organic Coconut milk into a bowl and add one tablespoon of curry paste and whisk for a few minutes until blended.
Then I take a large sauté pan, and in 1 tablespoon or so of coconut oil I sauté whatever vegetables I have on hand. Onion, broccoli, cauliflower, carrots, eggplant – any vegetable will work. If you are using meat or chicken you can sauté it before the veggies to get it cooked, put it on a plate and then start the veggies. If you are using fish or beans or leftover cooked meat, cook the veggies first and then add. I will sometimes add frozen shrimp as they’ll cook really fast.
So, once your veggies are partially cooked pour in the coconut milk/curry paste mixture and add your cooked meat/raw fish/frozen shrimp/cooked beans – whatever you’re using and let it simmer until done, usually around 10-20 minutes.
Serve with organic brown rice if you’re eating grain. I just have mine with a heaping tablespoon of organic Greek yogurt on the side. Delicious!
Amazon carries the brand, a link is below, but if you have an Asian store near you, you can buy many varieties and they are very inexpensive. Stock up on Coconut Milk there as well. Enjoy!
Read more, great Monday Mania Posts here: http://www.thehealthyhomeeconomist.com/2011/10/monday-mania-1032011/
Read more, great Fat Tuesday posts here: http://realfoodforager.com/2011/10/fat-tuesday-october-4-2011/
Read more, great Real Food Wednesday posts here: http://kellythekitchenkop.com/2011/10/real-food-wednesday-1052011.html
Read more, great Simple Lives Thursday posts: http://gnowfglins.com/2011/10/06/simple-lives-thursday-64/
Read more, great Pennywise Platter Thursday posts here: http://www.thenourishinggourmet.com/2011/10/pennywise-platter-thursday-106.html
Read more, great Fight Back Friday posts here: http://www.foodrenegade.com/fight-back-friday-october-7th/
Organic Stevia Cheesecake

Organic Stevia Cheesecake (gluten and grain free as well)
This is a very easy recipe and it lends itself to making a smaller recipe. The first time I made it I was figuring out the stevia amounts so I made a half recipe and it was great. The last time I made it I only had three packages of cream cheese so I cut the other ingredients accordingly and it also worked great. If you halve the recipe you can make it in six custard cups. It’s wonderful with a little fresh fruit or sugar free jam and it freezes really well too. The picture if from the first time I made this. Using all the cream cheese makes a thicker cheesecake, then pictured. It’s delicious too!
Ingredients:
32 ounces – 4 packages – organic cream cheese
1 tablespoon Stevia (use amount equal to 1 cup organic sugar)
1 teaspoon organic vanilla extract
1 teaspoon organic lemon juice (add lemon zest too)
4 organic, pastured eggs
3 tablespoons organic sour cream or organic Greek yogurt
Directions:
Preheat your oven to 300 degrees.
With an electric mixer, combine the cream cheese and splenda at slow to medium speed, scraping sides often. Add all other ingredients except eggs. When completely mixed (with no lumps), add the eggs and egg yolk, one at a time, beating very slowly. When eggs are incorporated, do not mix any more
Pour the mixture into a 9” springform pan. I make an easier version of a water bath for my cheesecakes. I put a 9×13 inch pan on the oven shelf below the cheesecake and put an inch or so of water in it. This makes the oven nice and humid but you don’t have to worry about wrapping the cheesecake itself.
Place the pan of water on a lower shelf while you are preheating the oven. Place the cheesecake in a 300-degree preheated oven. Cook for 1 hour and reduce heat to 200 degrees for 1 more hour. Turn oven off and leave cheesecake in until the oven is completely cool. This is how you avoid cracks in your cheesecake.
It may be beneficial to run a knife around the edge of the cheesecake, separating it from the sides of the pan. If your goal is to serve the cheesecake on a different dish without the bottom of the spring form pan, then the pan can be lined with parchment paper before the batter is poured in. Make sure to grease both sides of the paper. This will make for easy removal of the cheesecake later. It works best if the cheesecake has been refrigerated fully before trying to remove it from the bottom pan. Cheesecake is even better the second day. Enjoy!
Read more, great Monday Mania posts here: http://www.thehealthyhomeeconomist.com/2011/09/monday-mania-9262011/
Read more, great Fat Tuesday posts here: http://realfoodforager.com/2011/09/fat-tuesday-september-27-2011/
Read more, great Real Food Wednesday posts here: http://kellythekitchenkop.com/2011/09/real-food-wednesday-9282011.html
Read more, great Simple Lives Thursday posts here: http://gnowfglins.com/2011/09/29/simple-lives-thursday-63/
Read more, great Fight Back Friday posts here: http://www.foodrenegade.com/fight-back-friday-september-30th/
Read more, great Weekend Gourmet Blog Carnival posts here: http://hartkeisonline.com/cooking/weekend-gourmet-blog-carnival-september-26-2011/
Asian Chicken Thighs

Asian Chicken Thighs
Found this recipe for Asian Chicken Thighs. I use either one or two packages of TJ’s boneless organic thighs. Usually two as I am feeding a teenager but even then we have some leftovers.
They’re easy to make and really good!
Ingredients:
10 boneless organic chicken thighs (our TJ’s carries them)
2 organic garlic cloves minced
1 tbsp rice wine vinegar
1 tbsp sesame oil
1 tbsp curry powder
1/2 tsp onion powder
1/4 tsp black pepper
1/4 cup organic soy sauce (I use the Gluten Free variety)
2 tbsp organic olive oil
Organic Coconut oil for frying
Directions:
1. In a large bowl combine all ingredients except chicken thighs
2. Add chicken thighs to mixture, coat them completely and let them marinade for at least an hour. I usually make the marinade an hour or two before dinner and put the marinated in the refrigerator until I’m ready to cook.
3. Add about two tablespoons of coconut oil to a large pot and let it heat at medium temperature for about 5 minutes. You want a nice thick layer of oil on the bottom.
4. Add chicken thighs in batches to the pot and fry. I can fit around 5 in my pan at one time.
5. Cook the chicken thighs, turning them about every 5 minutes. Because of the marinade they have, they tend to get brown very quickly so please turn them often to prevent burning. It takes about twenty minutes for the batch of five thighs to be ready. Then I added the other batch of five and cooked them the same way.
I’ve made them a few times. Have served them with a salad, broccoli with butter and Sauerkraut. They’d be good with rice as well. Enjoy!
Read more, great Monday Mania posts here: http://www.thehealthyhomeeconomist.com/2011/09/monday-mania-9192011/
Read more, great Fat Tuesday posts here: http://realfoodforager.com/2011/09/fat-tuesday-september-20-2011/
Read more, great Real Food Wednesday posts here: http://kellythekitchenkop.com/2011/09/real-food-wednesday-9212011.html
Read more, great Simple Lives Thursday posts here: http://gnowfglins.com/2011/09/22/simple-lives-thursday-62/
Read more, Pennywise Platter Thursday posts here: http://www.thenourishinggourmet.com/2011/09/pennywise-platter-thursday-922.html
Gluten Free & Sugar Free Macaroons

This recipe is my version of one I found in Eating Stella Style by George Stella. Every recipe I’ve tried from this book has been excellent. These cookies were great. They are a bit crunchy the first day, and once you put them in the refrigerator – if you have leftovers – they get softer and keep for days. Very filling and wonderful with a little pastured butter on top.
Ingredients:
1/4 cup organic Almond Flour (made from grinding organic almonds – I soak and dehydrate mine first)
1/2 teaspoon baking soda
1/8 teaspoon Celtic salt
3 organic and pastured egg whites (see note about what I do with my yolks)
1 1/2 teaspoons organic vanilla extract
1/4 teaspoon pure orange extract (optional)
27 drops of liquid Stevia (or 1/3 cup organic sugar/sucanat)
1 1/2 teaspoons organic/pastured butter, softened, at room temperature
1 1/3 tightly packed cups organic shredded unsweetened coconut (use fresh or unsweetened shredded)
Special Equipment
optional: 1-ounce ice cream scoop
parchment paper or silicone mat-lined cookie sheet
Directions:
Place the baking rack in the center of the oven to 350 degrees F.
In a small bowl, whisk together the almond flour, baking soda and salt, and set aside.
In a medium bowl, whisk together the egg whites and extracts until foamy, then stir in the stevia and butter until well blended.
Add the mixed dry ingredients to the egg mixture and fold in the coconut until everything is combined. Wet your fingers and form 16 equal balls of the mix, about 4 teaspoons each, or use a 1-ounce ice cream scoop tightly packed with the mix. Place the macaroons on the lined sheet pan and bake for approximately 15 minutes, until they start to turn golden brown all over.
Remove the macaroons from the oven and let cool completely, about 15 minutes, before serving. Refrigerate any leftovers in a covered container. (Macaroons will soften greatly after being covered and refrigerated.) One net carb per cookie. Enjoy! Note: I use this recipe for the yolks – 3 yolks and 1 egg and lately have been using 27 drops of Stevia instead of the sugar – same oven temp so I make the custard right after the cookies http://momsforsafefood.net/2010/03/15/easy-egg-custard/
We’re on FB now! Look for Moms for Safe Food.
Read more, great Monday Mania posts here: http://www.thehealthyhomeeconomist.com/2011/08/monday-mania-8292011/
Read more, great Fat Tuesday posts here: http://realfoodforager.com/2011/08/fat-tuesday-august-30-2011/
Read more, great Real Food Wednesday posts here: http://kellythekitchenkop.com/2011/08/real-food-wednesday-8312011.html
Read more great, Simple Lives Thursday posts here: http://gnowfglins.com/2011/08/31/simple-lives-thursday-59/
Read more great Pennywise Platter Thursday posts here:http://www.thenourishinggourmet.com/2011/08/pennywise-platter-thursday-91.html
Read more great, Fight Back Friday posts here: http://www.foodrenegade.com/fight-back-friday-september-2nd/
Read more great, grain free recipes here: http://realfoodforager.com/2011/10/grain-free-real-food-linky-carnival/
Easy Eggplant Parmesan

Easy Eggplant Parmesan
We recently started getting beautiful eggplants from our CSA (community supported agriculture). I have to admit I’m not the biggest eggplant fan, so I started looking for eggplant Parmesan recipes. I found some that you didn’t have to fry the eggplant first – just broil them for a few minutes per side.
This turned out really well. Even one of our picky teenagers went back for seconds. Makes 6 servings
Ingredients:
2 organic eggplants, around 1 pound each
¼ cup organic olive oil (or coconut oil)
½ tsp. Celtic or sea salt
2 – 3 tablespoons fresh basil, sliced thinly
2 – 3 cups organic marinara or pasta Sauce
16 ounces organic shredded mozzarella cheese
½ cup grated Parmesan cheese
Directions:
Trim the ends off the eggplants and slice lengthwise into 1/2″ slices. You should
get around 6 – 8 slices from each eggplant. Brush both sides of the eggplant slices with olive oil or coconut oil to coat. Place them in a single layer on a baking sheet.
Broil about 5 minutes per side until tender and a little browned. Watch them closely because they can burn quickly. Lightly sprinkle them with celtic salt after removing from the oven.
Layer everything in a greased 9×13 baking dish in this order: 6 – 8 eggplant slices,
½ of the sauce, , ½ of the basil, ½ of the mozzarella. Repeat the layering again then sprinkle with the Parmesan cheese.
Bake at 350º about 30 minute or until the cheese is bubbly and lightly brown. Enjoy!
Read more, great Monday Mania posts here: http://www.thehealthyhomeeconomist.com/2011/08/monday-mania-8222011/
Read more, great Real Food Wednesday posts here: http://kellythekitchenkop.com/2011/08/real-food-wednesday-8242011.html
Read more, great Workshop Wednesday posts here: http://goodbyecityhellosuburbs.blogspot.com/2011/08/workshop-wednesday-21.html
Read more, great Simple Lives Thursday posts here: http://gnowfglins.com/2011/08/25/simple-lives-thursday-58/
Read more, great Pennywise Platter Thursday posts here: http://www.thenourishinggourmet.com/2011/08/pennywise-platter-thursday-825.html
Read more, great Fight Back Friday posts here: http://www.foodrenegade.com/fight-back-friday-august-26th/
Gluten and Sugar Free Chocolate

Sugar & Gluten Free Chocolate
I’ve been playing around with different homemade chocolate ideas that are both sugar and gluten free. This is a great recipe and you can make it with many different variations. I had a variety of chocolate molds already from a chocolate kit that one of my kids got me (he likes chocolate;) for a gift a few years ago. You can find them on Amazon, at Michaels and at any candy making supply store. They are only a few dollars apiece and work great. This recipe uses whey protein powder. I had never used it before but found one by Dr. Mercola http://proteinpowder.mercola.com/Pro-Optimal-Whey-Protein.html that is GMO free from grass fed cows, and sweetened with stevia, but you can skip it if you’d like. I’ve made it with both cocoa butter and with coconut manna (or coconut oil) substituted for the cocoa butter. Both are really good. You can add nuts, dried fruit and if you like spicy chocolate add a little cayenne or curry power. One batch filled two mold sheets. Whenever I have a little extra I mix it on waxed paper with nuts and make chocolate bark.
Ingredients:
2 oz. Organic Cocoa Butter (or Coconut Manna, or Coconut oil)
2 oz. Organic Unsweetened Chocolate
½ cup Whipping or Heavy Cream, preferable organic and raw
2 tsp. SweetLeaf Stevia Powder (use less & to taste if you’re using liquid stevia)
1/8 tsp. Celtic Sea salt
1 tsp. Organic Vanilla Extract
6 Tablespoon of Whey Protein Powder
Directions:
Get your chocolate molds out, or you can use a sheet pan covered with a layer of wax paper. I don’t oil my molds, after the chocolate is frozen they pop out pretty easily.
Chop the cocoa butter and chocolate into small pieces. Place into a double boiler or a glass bowl and melt over hot — not boiling — water. Remove from heat and stir to combine.
In a food processor or blender, combine the cream, stevia, salt and vanilla. (You can just mix it all up with a spoon but with the whey it will dissolve better if you blend it). Pulse to combine. Add the whey protein and pulse to combine. Let sit for a minute or two to dissolve the protein powder, then blend briefly until smooth.
With the motor running, slowly add the chocolate mixture. Pour into your chocolate molds, or onto waxed paper – you can put it by the spoonful to make bite sized pieces. Freeze for a few hours and then you’ll be able to unmold it. I freeze it in a plastic container. It melts pretty fast once it’s out of the freezer, but is so good. Enjoy!
Carb and variation notes: Net carb count for the entire batch is under 11 grams. You can make a ‘milk chocolate variation, decreasing the unsweetened chocolate to ½ oz and using a little less stevia with net carbs under 9 grams and you can make a white chocolate bar by omitting the dark chocolate and increasing the cocoa butter to 3 oz, the vanilla to 2 tsp and the whey to ½ cup. Net carbs under 6 grams for the whole batch.
Read more, great Monday Mania posts here: http://www.thehealthyhomeeconomist.com/2011/08/monday-mania-8152011/
Read more, great Real Food Wednesday posts here: http://kellythekitchenkop.com/2011/08/real-food-wednesday-8172011.html
Read more, great Workshop Wednesday posts here: http://goodbyecityhellosuburbs.blogspot.com/2011/08/workshop-wednesday-20.html
Read more, great Simple Lives Thursday posts here: http://gnowfglins.com/2011/08/18/simple-lives-thursday-57/
Read more, great Pennywise Platter Thursday posts here: http://www.thenourishinggourmet.com/2011/08/pennywise-platter-thursday-818.html
Gluten & Sugar Free Blueberry Muffins

Gluten & Sugar Free Blueberry Muffins
My husband and I – the teens are doing their own thing – are on our second month of gluten and sugar free eating. We’re feeling really good eating this way. These muffins are great! After the first day, I take the leftovers and freeze them. Then we can pull two out as we want and give them a quick reheat in the oven. They are wonderful warm, split in half with pastured butter on top and they are very filling and they’re low carb as well – less then 2 grams per muffin. One is plenty! And my husband was amazed at how good they are. He liked them as well – if not better – then the blueberry muffins we used to make: http://momsforsafefood.net/2010/02/01/organic-blueberry-muffins/
Ingredients:
2 cups organic almond meal – we make ours from crispy almonds
2 teaspoons baking powder
¼ teaspoon Celtic or sea salt
½ cup (1 stick) organic/ pastured butter, melted
4 organic/pastured eggs
1/3 cup water
1 cup fresh or frozen organic blueberries
½ tsp. organic lemon zest
1 tsp. organic vanilla extract
Stevia to taste = to 1/3 to ½ cup of sugar.
Preparation:
1) Preheat oven to 350 F.
2) Butter or put muffin cups into a 12 muffin tin.
3) Mix dry ingredients together well.
4) Add wet ingredients and mix thoroughly. You don’t have to worry about overmixing with almond flour/meal
5) Put in muffin tins (about 1/2 to 2/3 full) and bake for about 20 – 25 minutes, until a toothpick comes out clean.
Enjoy!
Read more, great Monday Mania posts here: http://www.thehealthyhomeeconomist.com/2011/08/monday-mania-812011/
Read more, Motivate Me Monday posts here: http://craftskeepmesane.blogspot.com/2011/07/motivate-me-monday-81.html
Read more, great Made from Scratch Tuesday posts here: http://messhalltobistro.blogspot.com/2011/08/made-from-scratch-tuesday-82.html
Read more, great Tasty Tuesday posts here: http://beautyandbedlam.com/do-your-eating-habits-change-during-the-seasons/
Read more, Tempt my Tummy Tuesday posts here: http://www.blessedwithgrace.net/2011/08/tempt-my-tummy-tuesday-orecchiette-with-peas-shrimp-and-buttermilk-herb-dressing/
Read more, great Real Food Wednesday posts here: http://kellythekitchenkop.com/2011/08/real-food-wednesday-832011.html
Read more, Works for me Wednesday posts here: http://wearethatfamily.com/2011/08/wfmw-vinyl-wall-art/
Read more, Women Living well posts here: http://womenlivingwell.org/category/women-living-well-wednesdays/
Read more, Let’s Do Brunch posts here: http://sweetsav.blogspot.com/2011/08/lets-do-brunch.html
Read more, What’s Cooking Wednesday posts here: http://thekingscourt4.blogspot.com/2011/08/whats-cooking-wednesday-8311.html
Read more, great Healthy 2 day Wednesday posts here: http://day2dayjoys.blogspot.com/search/label/Healthy%202day%20Wednesdays
Read more, great Pennywise Platter Thursday posts here: http://www.thenourishinggourmet.com/2011/08/pennywise-platter-thursday-84.html
Read more, great Simple Lives Thursday posts here: http://gnowfglins.com/2011/08/04/simple-lives-thursday-55/
Read more, great Fight Back Friday posts here: http://www.foodrenegade.com/fight-back-friday-august-5th/
Chicken in Lemon Cream Sauce

I’ve made this a few times in the last few weeks, as everyone liked it so much. You can use whatever vegetables you have on hand but what I used below was wonderful and it’s another good way to use zucchini if you’re growing it in your garden, like I am. This is easy to make, takes around a half hour, and is nice enough to serve for company.
Ingredients:
1/4 cup organic pastured butter
1 to 1 ½ pounds organic chicken tenders or skinless thighs
2 tbsp. dry vermouth
1/2 tsp. grated organic lemon peel
2 tbsp. organic lemon juice
1/4 tsp. Celtic or sea salt
1/8 tsp. white pepper
1 cup organic heavy cream, preferably fresh and raw
1/3 cup organic grated Parmesan cheese
½ – 1 cup organic sliced mushrooms
½ – 1 cup sliced organic zucchini
3 organic scallions, chopped
Directions:
Melt butter in large skillet over medium heat; add chicken. Cook, turning, about 10 minutes (around 5 minutes per side) or until chicken is brown and tender.
Remove chicken to ovenproof serving dish. There should be lots of wonderful butter left in your pan. Saute your vegetables in the butter for 5 minutes, or until just tender and then put the veggies in the casserole on top of the chicken.
Add wine, lemon peel and lemon juice to skillet; cook and stir over medium heat 1 minute. Stir in salt and white pepper. Gradually pour in cream, stirring constantly, until hot; do not boil! Pour cream sauce over chicken and vegatables; sprinkle with Parmesan cheese.
Place the dish in your oven around 6 inches from heat source and broil until lightly browned, about 3-4 minutes. Enjoy!
Read more, great Monday Mania posts here: http://www.thehealthyhomeeconomist.com/2011/07/monday-mania-7182011/
Read more, great Real Food Wednesday posts here: http://kellythekitchenkop.com/2011/07/real-food-wednesday-7202011.html
Read more, great Simple Lives Thursday posts here: http://gnowfglins.com/2011/07/20/simple-lives-thursday-53/
Read more, great Pennywise Platter Thursday posts here: http://www.thenourishinggourmet.com/2011/07/pennywise-platter-thursday-721.html
Read more, great Fight Back Friday posts here: http://www.foodrenegade.com/fight-back-friday-july-22nd/
Grassfed Steak Fajitas

Grassfed Steak Fajitas
We bought 1/8 of a grassfed cow last month, it was around 40 pounds of meat, and some of the cuts were not ones I usually buy. We have two packages of ‘fajita meat’ so I started looking around for recipes. I found a few that I tweaked together, and added in what veggies we had in the house to make this. I’m not eating grains at the moment so I just had mine on a plate with a little shredded raw cheddar and they were delicious. We all like them so much that I made it again a week later.
Ingredients:
NOTE: What you see in the pictures is double the steak and the marinade ingredients listed. I wanted leftovers.
1 pound grass fed flank steak or skirt steak, cut into strips.
Marinade:
A few tablespoons of Olive oil
Juice of 1 organic lime
2 cloves organic garlic
½ teaspoon ground cumin
½ tsp chili powder
1/4 cup chopped fresh organic cilantro, including stems
Veggies:
1 large organic yellow onion
2 large organic bell peppers (I used one yellow, one red)
3 organic scallions
2 organic zucchini, cut into little stick shapes
1 Tablespoon of organic Coconut oil
Serve with:
Tortillas, brown rice or on their own.
Shredded cheese
Salsa
Directions:
The meat we had was already cut into strips so I put it into a glass dish and tossed the meat with the marinade. I covered it and let it marinate for a few hours in the refrigerator.
First I cooked the meat in a large frying pan with a little coconut oil, until cooked through, it took around 10 minutes. Then I took the meat out of the pan and set it aside, covered to stay warm.
Next I cooked the veggies in the same pan, with a little more coconut oil and cooked until they were done. Then I added the meat back into the pan and mixed them both together.
You can serve them with tortillas, brown rice, or as they are. They’re wonderful with a little cheese and salsa. Guacamole would be great too. Enjoy!
Read more, great Monday Mania posts here: http://www.thehealthyhomeeconomist.com/2011/07/monday-mania-7112011/
Read more, great Real Food Wednesday posts here: http://kellythekitchenkop.com/2011/07/real-food-wednesday-7132011.html
Read more, great Real Food Weekly posts here: http://www.thewholegang.org/2011/07/real-food-weekly-july-14-2011/
Read more, great Simple Lives Thursday posts here: http://gnowfglins.com/2011/07/14/simple-lives-thursday-52/
Read more, great Pennywise Platter Thursday posts here: http://www.thenourishinggourmet.com/2011/07/pennywise-platter-thursday-714.html
Read more, great Things I love Thursday posts here: http://thediaperdiaries.net/voluminous-million-lashes-things-i-love-thursday/
Read more, great Fight Back Friday posts here: http://www.foodrenegade.com/fight-back-friday-july-15th/